Making a scale model of my backyard. . .
so far I have created a tiny version of my shed and the kids' swingset.

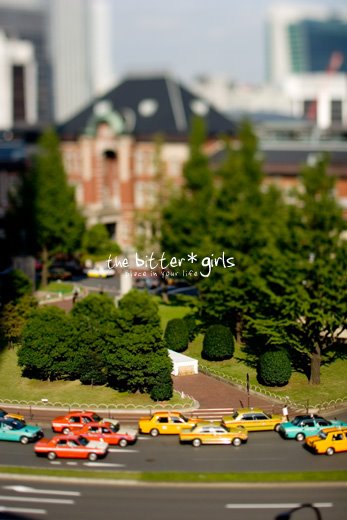
Actually, this is a lie. These are "tilt-shift" image manipulations.
Better examples of this type of image are available at this Japanese blog:
From shygantic on flickr...
Here's how to use The Gimp to fake a tilt-shift. I like The Gimp.
Step 1 Set gradient mask
Open the image and toggle the switch mask on. There are three ways to do this. Click the dotted box in the bottom left had corner of the open image, got to Select > Toggle Quick Mask, or press Shift+Q. The image will now be pink. Click on the gradient tool. It looks like a square with a green gradient applied to it. Set the Gradient to Bi-linear.
Step 2 Apply mask
Pick your focal point. Decide what areas of the image you would like to be in or out of focus. Click in the center of the area you would like to be in focus and drag a line perpendicular to the direction you want to be masked. Play around with the center, size, and angle of the mask until you get what you are looking for. Toggle the switch mask off.
Step 3 Apply blur
The gimp doesn't have Lens Blur like Photoshop. We have to make do with Gaussian Blur. Go to Filters > Blur > Gaussian Blur. In the Gaussian Blur window click on Preview and maximize the window so that you can see what you are doing. Play with the blur radius until it looks right. A Blur radius between 5.0 and 10.0 seems to work most of the time. When you have the blur right, delete the quick mask be going to Select > All.
Step 4 Adjust curves
Go to Layer > Colors > Curves. Click at about x: 130 y: 210. Move the curve around until you get what you are looking for.
0 comments:
Post a Comment